Make Animation Movies
Note
The motor dataset and its segmented results can be found at : <Avizo Install Path>/Avizo-7.0.1/data/tutorials/
Design your animation
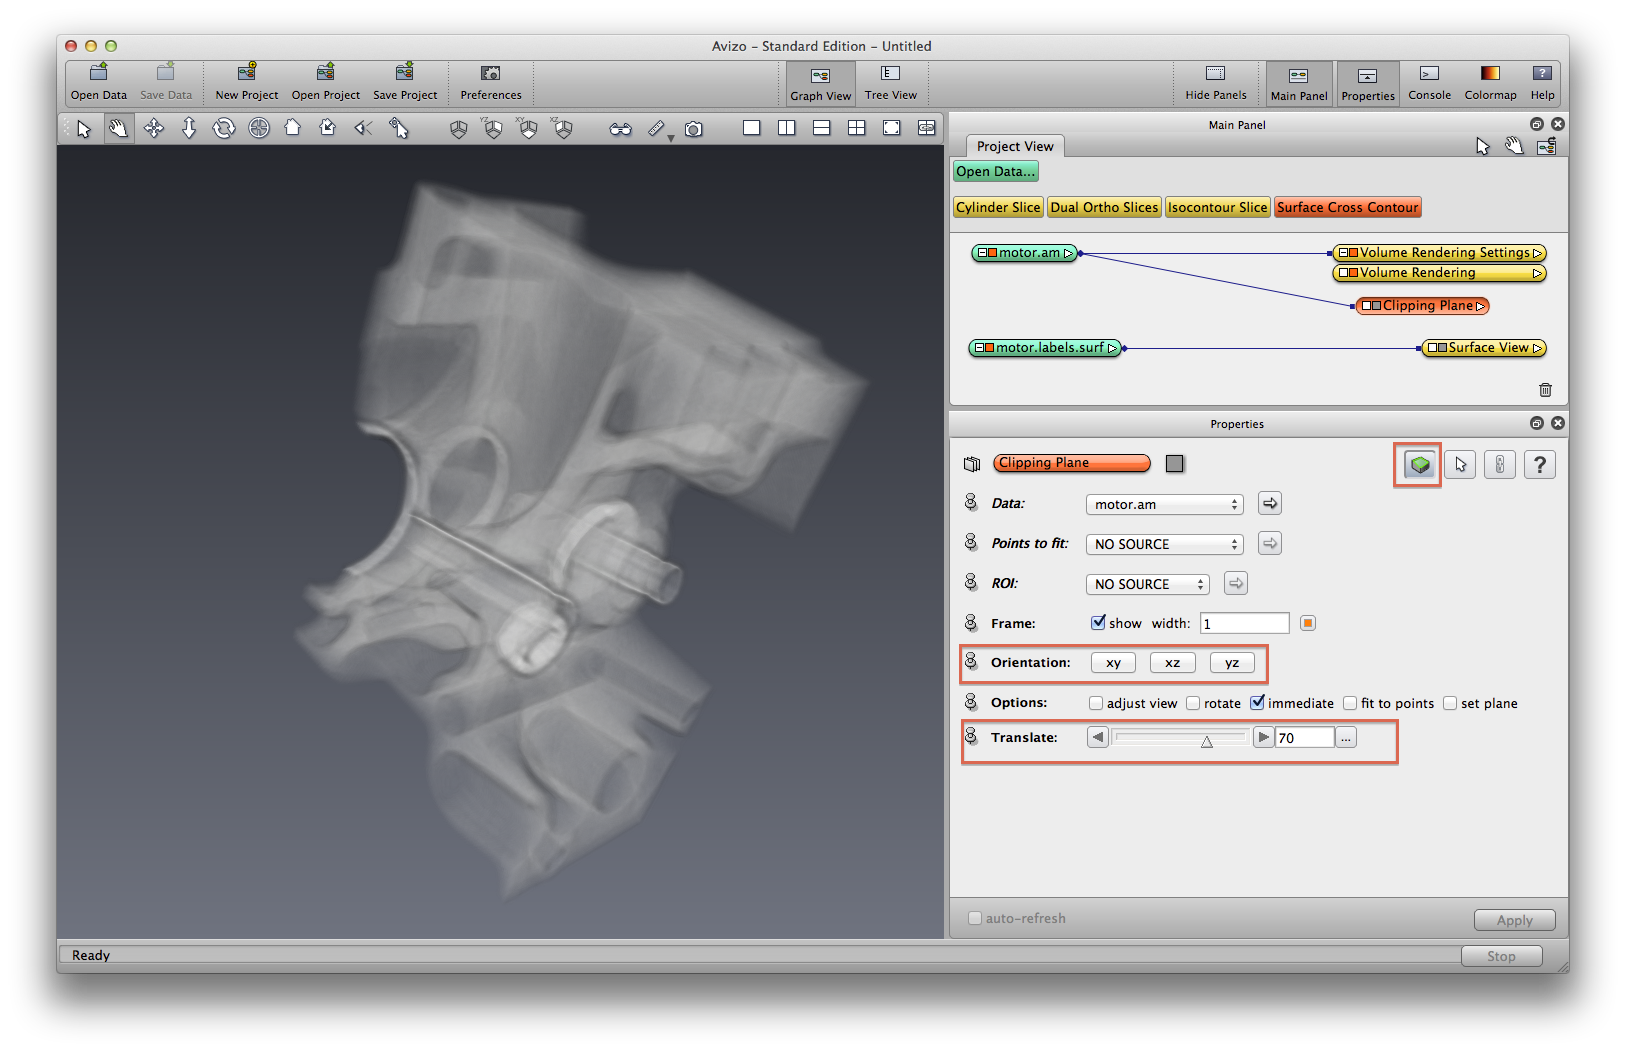
Lauch Avizo 7, open dataset motor.am. Use volume rendering to visualize. Right click on motor.am, choose Display->Clipping Plane, click on the clip icon in Properties panel to enable clipping. Find the Translate section, drag the slider the change where the clipping plane is. hide the clipping plane.
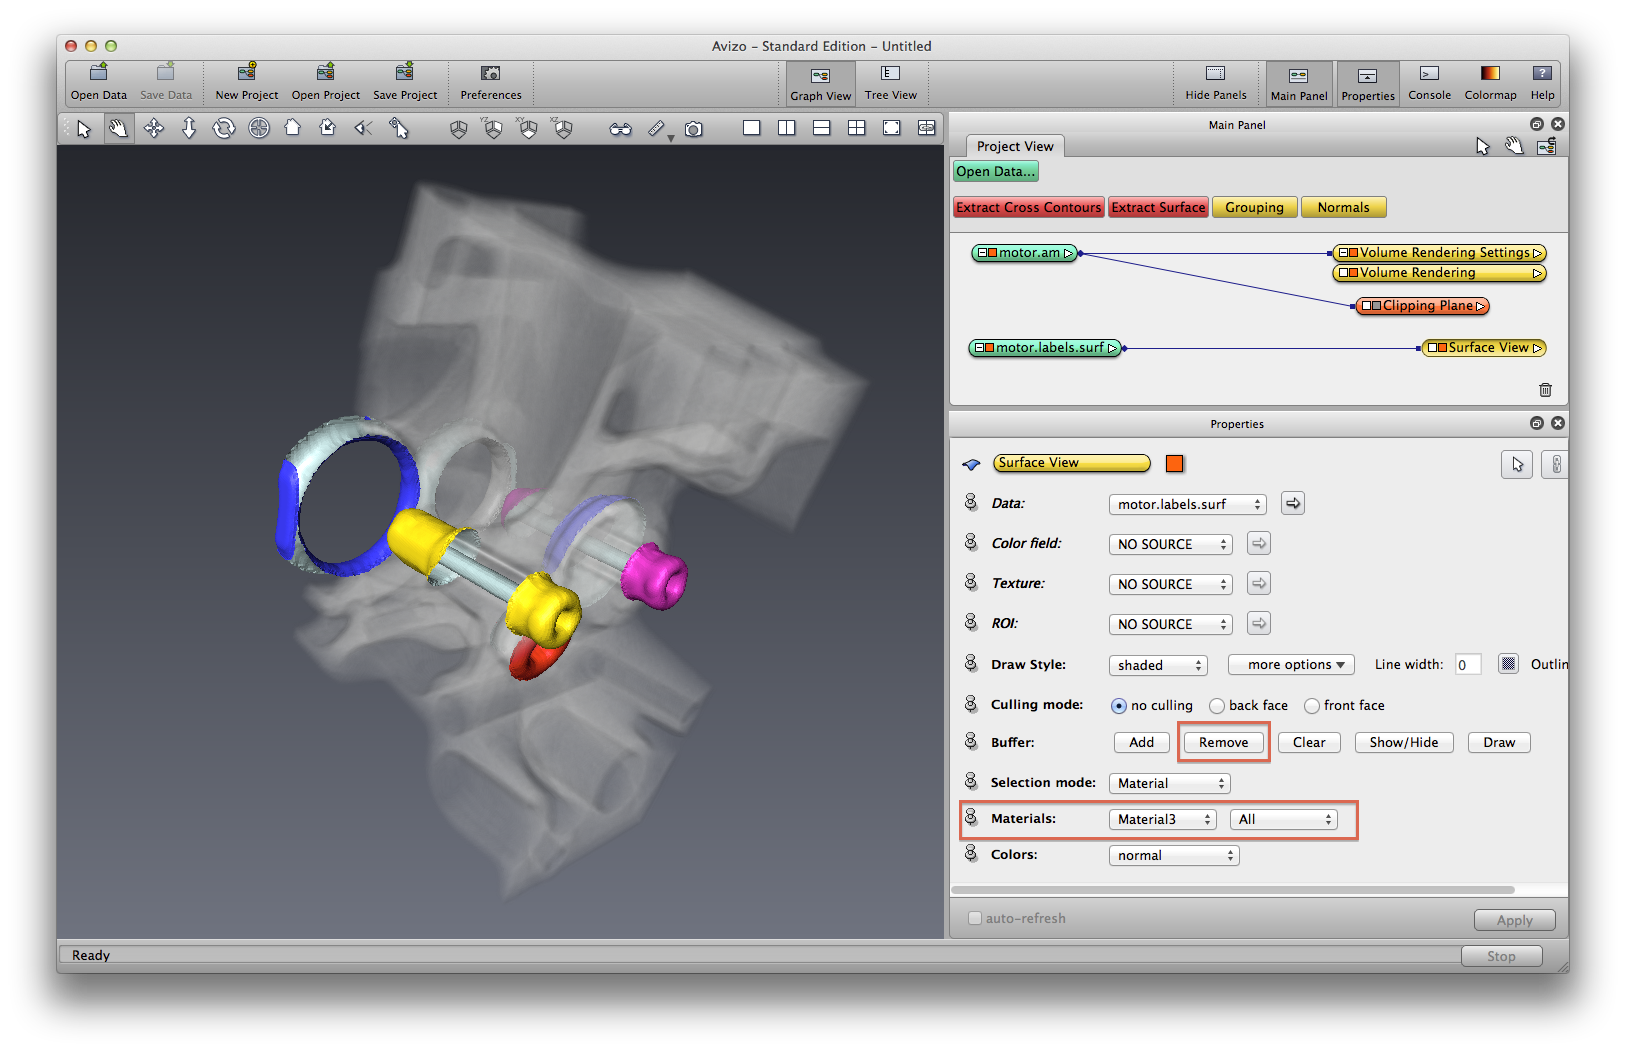
Also open dataset motor.labels.surf, use surface view to visualize. Click on Surface view module, find the “Materials” section in Properties panel, click on the left side drop box, choose Material3 from the drop-down list, this material will be highlighted in red, click the “Remove” button in Buffer section to remove display of Material3.
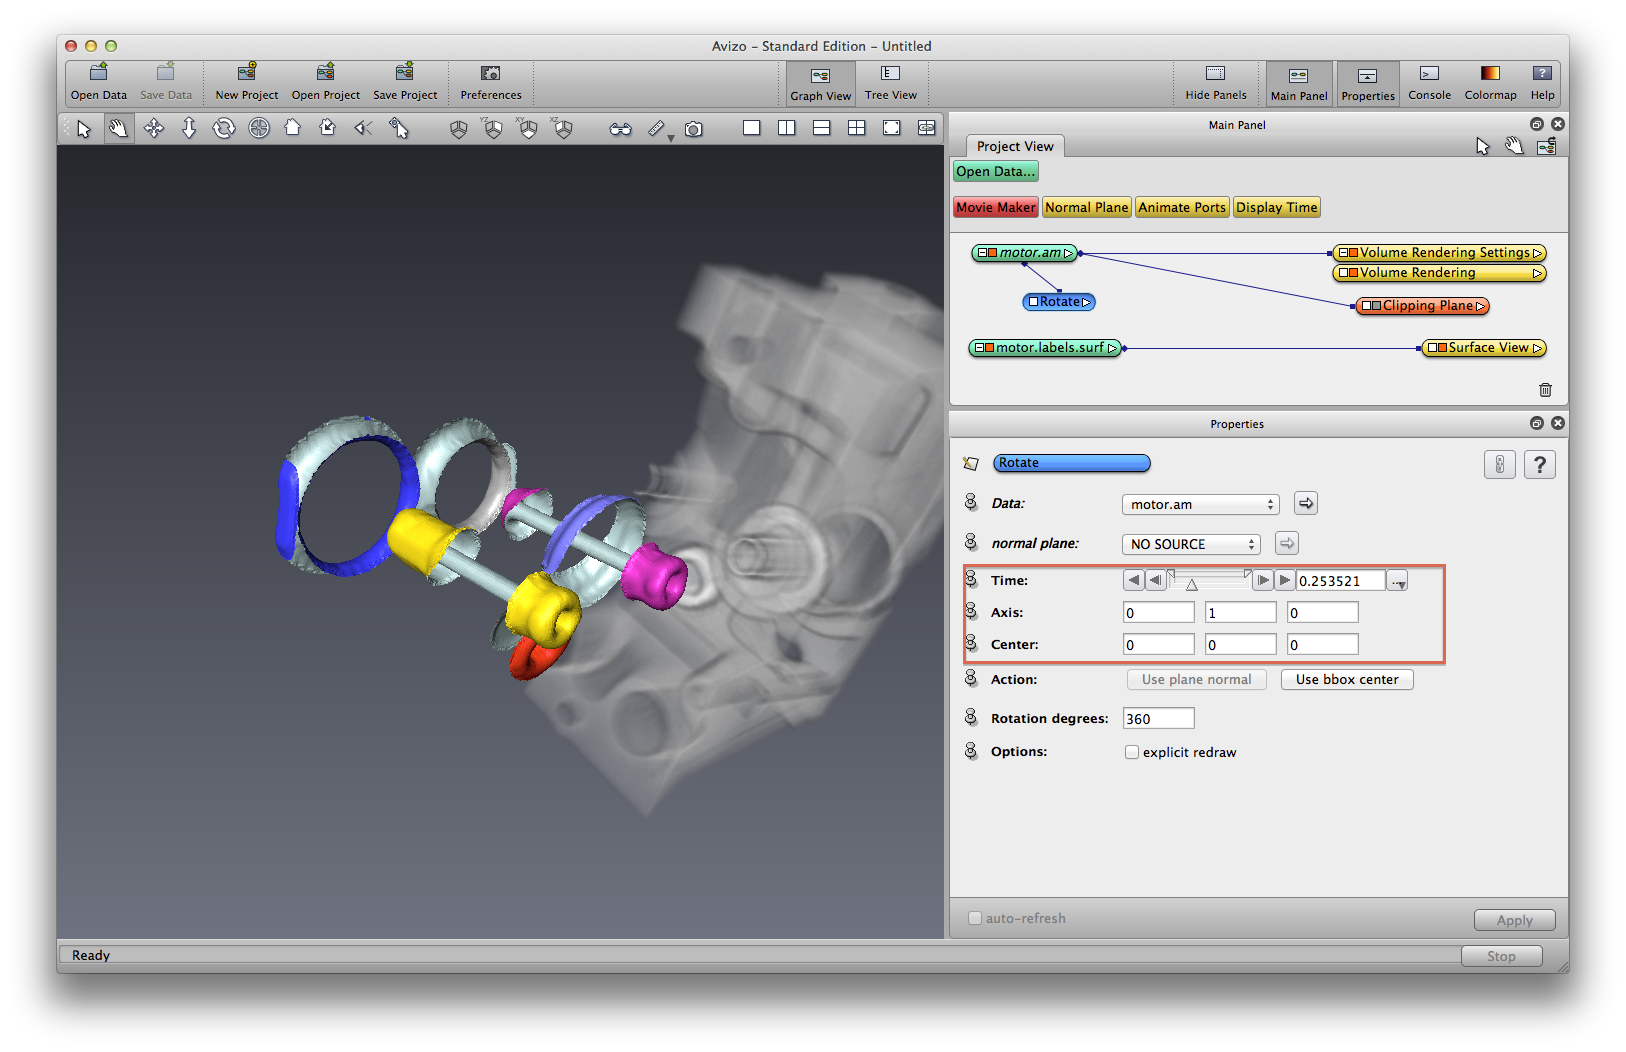
There are different perspectives when it comes to animation: Animate data object, or animate camera, or animate visualization property? When we animate orthoslice, or clipping plan, or volume rendering transparency, etc, we are animation visualization property. If you want to animate the motor itself, right click on motor.am, choose Animate->Rotate, drag the time slider to see the rotation, notice the rotation center and axis, which you can also change in Properties panel.
For camera animation, we introduce two different ways to make camera animation in Avizo: Camera orbit, and camera path keyframe editor.
Right click in empty space, choose Create->Animation/Demo->Camera Orbit. In Properties panel, find Action section, choose from the drop-down list of the second item, this changes the center of camera orbit. Play the animation in Time section. If you changed view in the main view window, click “recompute” button in Action section to recompute the animation.

Right click in empty space, choose Create->Animation/Demo->Camera Path. Open camera path editor, a separate camera path edit/view window will open. Change view position or zoom level in main window, then click “add” button to add a keyframe. Play the animation.
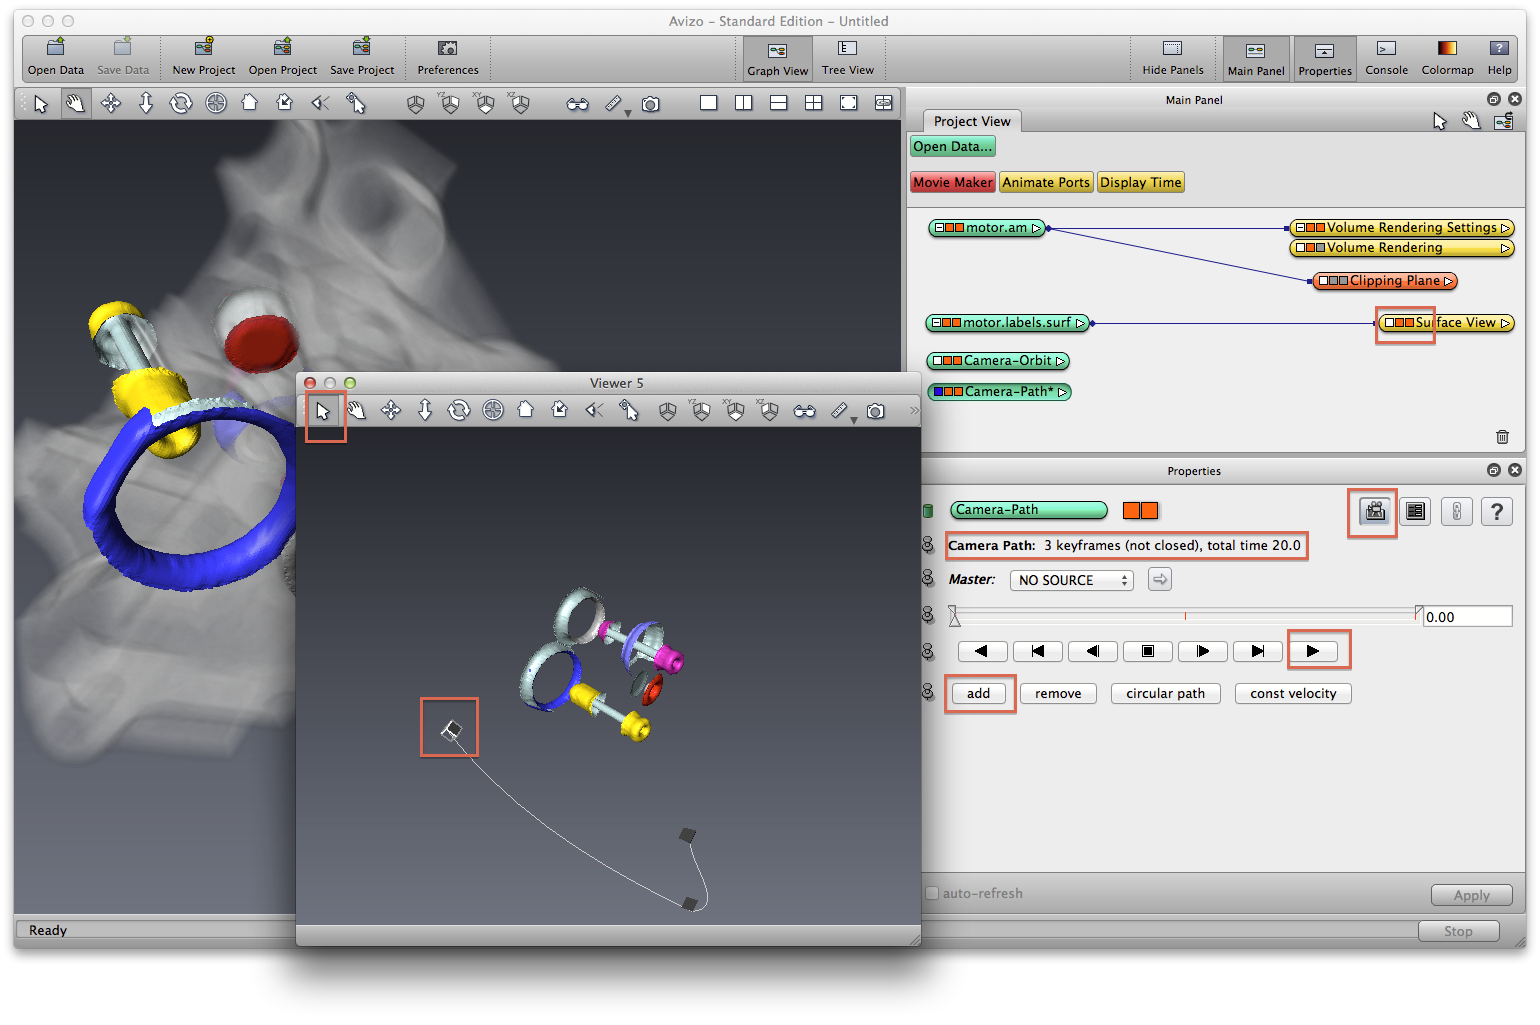
Click your mouse inside the camera path view window, move around until you can see the camera path, if you can’t, try to zoom out more. You can also use the hide/show color block in your visualization module icon to choose what you want to see in the camera path view window. Switch to interaction mode (arraw), click on any camera icon to select it, then you can change its position and orientation interactively. When you change the camera, you can see the view updates in the main window.
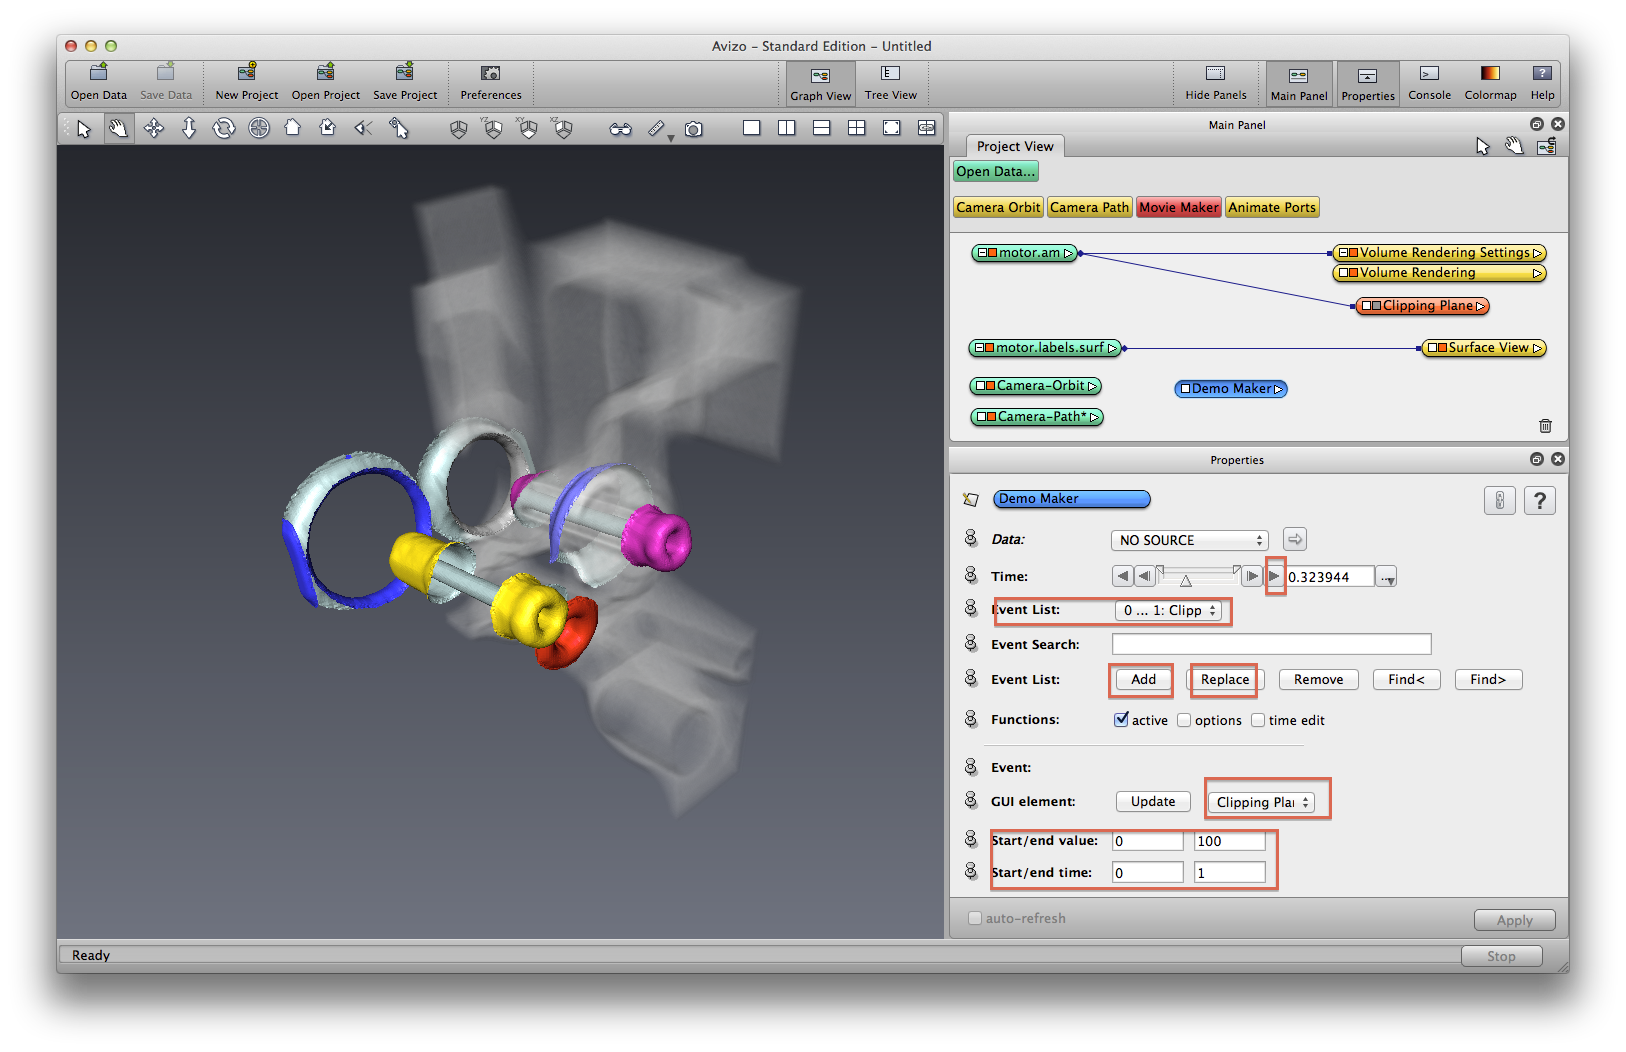
Right click in empty space, choose Create->Animation/Demo->Demo Maker. Using demo maker, you can add any kind of animation as sequenced events to create a animation demo. Try to add a clipping plane animation to demo maker. Find the GUI element section in Properties panel, click event list to choose the “Clipping Plane/Translate” event, set start/end value to be 0 and 100, set set/end time to be 0 and 1, click Add button in “Event List” section to add the event, play the animation in Time section.
Camera Orbit and Camera path can also be integrated into demo maker, using events such as “camera Orbit/time”, “camera path/time”.

Review and fine tune each event in demo maker, add more animations, such as volume rendering transparency. Click the Replace button in “Event list” section, if you made changes to an existing event.
Right click on “camera orbit”, or “camera path”, or “demo maker” object, choose Movie Maker, render a movie. You can choose to render as image sequence, or mpeg movie directly.
