Use Maya utility nodes to create elastic joint chain
Normal IK
Measure the distance
- create a chain IK from the first to last joint
- Select Create -> Measure Tools -> Distance Tool. Hold down ‘V’ key to point snap, then click once on the base joint, and again on the tip joint. This will result in the creation of two locators with a visual represenation of the distance between them.
- Parent each measure tool locator under its respective node (base joint or ik handle). Now as you move your ik handle, the distance tool will update with a new length.
Use expression
There are two ways to create the strechy joint chain. The first is use expression :
Select the first joint (base joint).
In the channel box, click the ‘scaleX’ attribute, choose Edit -> expressions
input the following code as expression
scale = distanceDimensionShape1.distance / 28.069;
if(distanceDimensionShape1.distance > 28.069)
{
    joint1.scaleX = scale;
    joint2.scaleX = scale;
    ...
} else {
    joint1.scaleX = 1;
    joint2.scaleX = 1;
    ...
}
Use utility nodes
For some reason, the expression always get lost after you save and reopen the scene again. So here we use utility nodes to make the joint chain squashy as well :
choose the two measure locators (usually I have them under rig->controls->noshow)
go to main menu, Hypergraph: Connctions. Plot the input-output connections. Between the locator and the joints, you can see some utility nodes already there: a distanceBetween node, a condition node, and a multipyDivide node. This
The exising utility nodes exist because we did use expression to make the joint chain stretchy before.
Now we’ll add some more nodes to make the chain squashy.
Add two more Condition nodes. Now we have total 4 condition nodes, plus the distanceBetween node, and a multiplyDivide node.
Suppose we know from the measure tool, that the default relax distance is 25.722, and the full chain distance is 28.069. Let’s say we want to stretch the chain when distance D > 28.06 with scaleX = D/28.06 (>1), and begin to squash when D < 25.7 with scaleX = D/25.7 (<1). When 28.06 >= D >= 25.7, we don’t strech/squash (scaleX = 1)
- condition nodes arrangement:
- if 25.7 < D : O1 = 1.0; else O1 = D;
- if 28.06 > D : O2 = 1.0; else O2 = D;
- if O1 == O2 : O3 = 25.7; else O3 = D;
- if D >= 28.06 : O4 = 28.06; else O4 = 25.7;
- multiplyDivide node:
- S = O3 / O4;
S should be plugged into each joint’s scaleX attribute already.
Spline IK
If spline IK is used to create the chain IK, here is how to do the stretch/squash:
Create spline IK, you may want to turn on/off the “auto simplify curve option” for the spline IK tool
select curve1, change to “surface” menu set, Edit Curves -> Selection ->Cluster Curve. This will create clusters for curve CV. You can now create custom controls for the clusters if you want.
Open HyperShade editor from menu Window -> Rendering Editors -> HyperShade. From main window outliner, select curve1, come back to hypershade, menu Graph -> Add selected to Graph. curve1 node will appear in work area. From main window, in MEL script input area, type: arclen -ch 1; then enter. The curveInfo node will appear in hypershade work area.
Select all joints in the chain and add them to hypershade (not IK, if selected by accident, Graph->remove selected from Graph, don’t delete)
Add utility node “MultiplyDivide”. You can rename the node to “Ratio” in channel box, if you want.
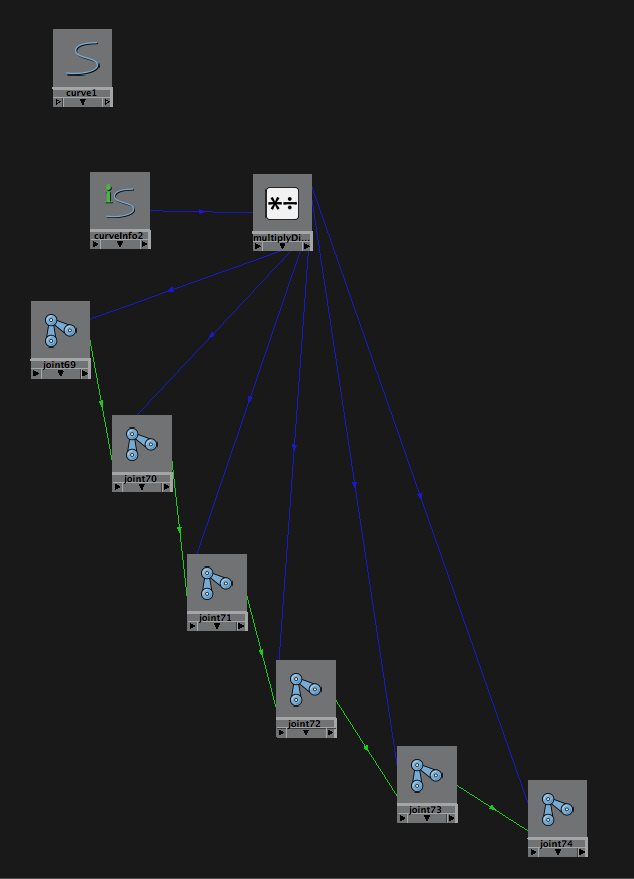
Connect curveInfo arcLength to Ratio input1X. Select Ratio, in attribute Editor, change Operation to “Divide”, copy input1X to input2X, lock input2X.
Connect Ratio outputX to each joint ScaleX. See screenshot: