Render the Scene : Basics
Rendering is the final stage in the 3D computer graphics production process. Though the wider context of rendering begins with shading and texturing objects and lighting your scene, the rendering process ends when surfaces, materials, lights, and motion are processed into a final image or image sequence.
Software rendering (Maya Software and Mental Ray) produces images of the highest quality, letting you achieve the most sophisticated results.
Hardware rendering (Maya Hardware and Viewport 2.0) uses the computer’s video card and drivers installed on the machine to render images to disk. Hardware rendering is generally faster than software rendering, but typically produces images of lower quality compared to software rendering.
Maya Scene View Renderer (Hardware)
When building your model and animation in Maya, you look at the scene using the GUI viewport. The viewport gives you a low quality rendering but fast response time. From the “Renderer” menu, there are three different renderers you can choose for the viewport rendering.
- Default Quality Rendering: the scene views are drawn with low quality settings by the hardware renderer.
- High Quality Rendering: the scene views are drawn in high quality by the hardware renderer. Click the option box, there are some settings you can further tune. Keep in mind that quality is always a tradeoff of performance.
- Viewport 2.0: the high performance scene view are drawn by hardware renderer that optimizes large scenes. It allows you to interact with complex scenes with many objects as well as large objects with heavy geometry. Viewport 2.0 scene renderer uses latest hardware rendering techonologies, supports more advanced features such as motion blur.
Maya Software Renderer and Mental Ray : Render the Final Image
Maya’s software renderer is an advanced, multi-threaded renderer. It is based on a rendering technology that is built directly into Maya’s dependency graph architecture. The Maya software renderer supports all of the various entity types found within Maya including particles, various geometry and paint effects (as a post render process) and fluid effects.
Mental Ray is a production-quality rendering application originally developed by Mental Images (Berlin, Germany) and later acquired by Nvidia. Mental Ray for Maya offers all the features traditionally expected of photorealistic rendering and includes functionality not found in most rendering software, such as caustics, global illumination, Physical Sky, etc.
Render Camera
- You can direclty render from default cameras: persp, side, front, top. But it’s generally a better idea to create a render camera:
- from main menu: Create > Cameras > camera type > , where Type is the type of camera. Or,
- from viewport menu: to create a prespective camera: Panels > Perspective > new
- camera name for current view will be displayed at the bottom of the viewport
- Get current view camera and change attributes:
- View > Select Camera
- View > Camera Attribute Editor
- Change camera for current view:
- select camera from outline, then Panels > look through selected. Or
- Panels > Perspective > YourCameraName
- Frame the scene for current camera:
- View > Frame all, View > Frame Selection
- Ctrl + Alt drag over region
- View > Camera Tools
- Turn on Resolution gate:
- View > Camera Settings > Resolution Gate. Or,
- click resolution gate icon from viewport toolbar, right next to the grid and film gate icons.
- Make the camera renderable:
- Render Settings window, Common tab, Renderable Camera section
- click Add Renderable Cameras
- to remove a camera from renderable list: use the trash icon
Render Settings
Navigate to Window > Rendering Editors > Render Settings. Or click on the toolbar, render tab.

The render setting window appears:
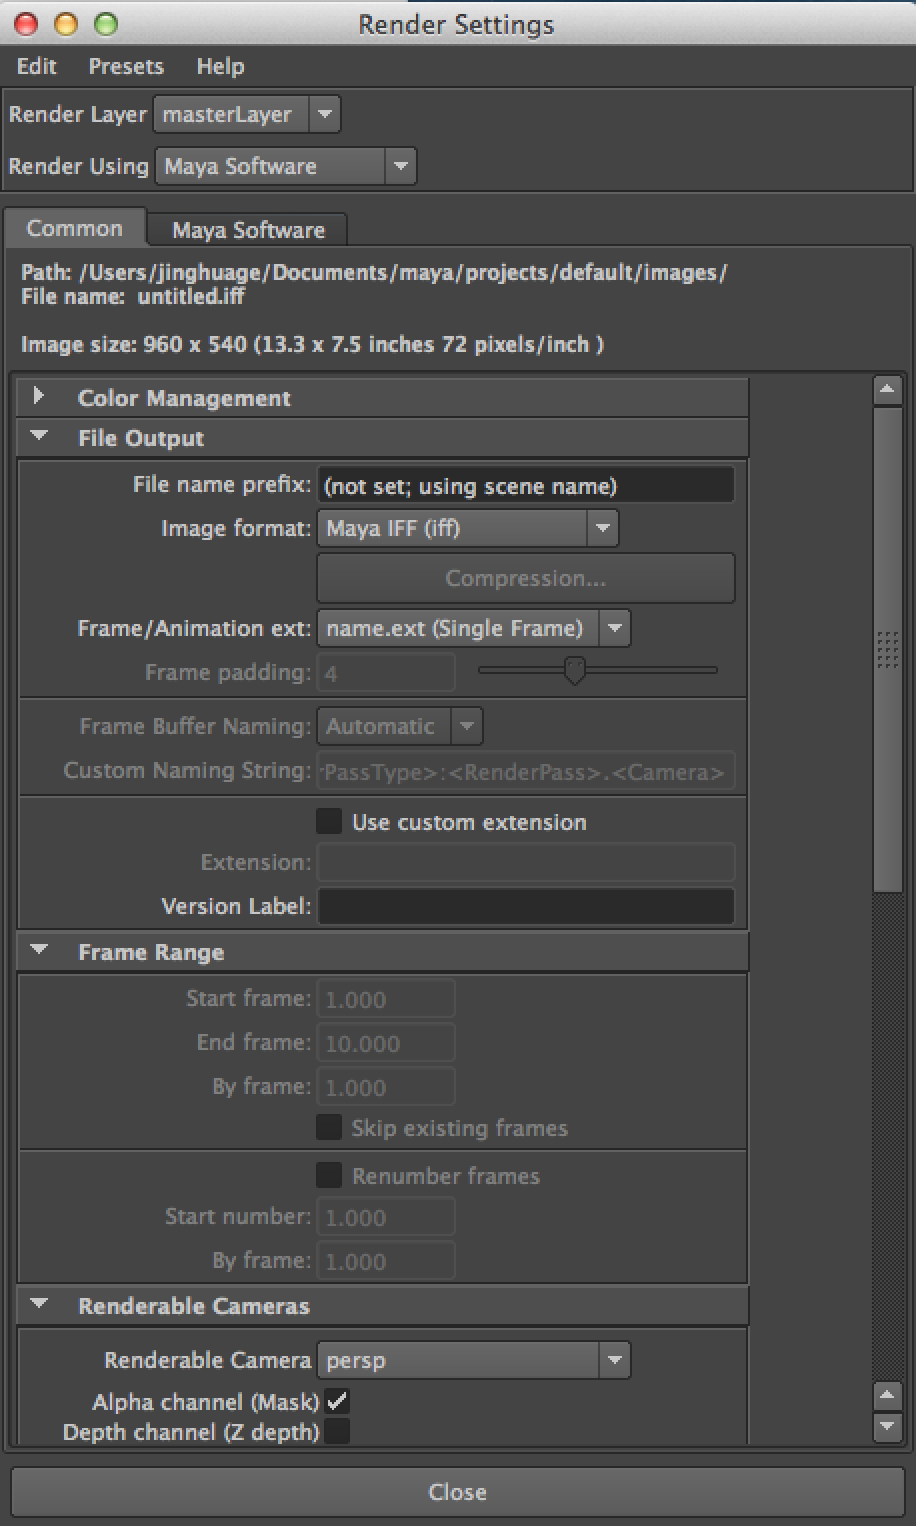
- Choose Renderer: Render Using:
- Maya Software
- Maya Hardware
- Mental Ray
- File Name Convention:
- file name prefix: file path and name
- image format: iff, jpeg, png
- frame ext: animation frame extention format, e.g. save image as image.0001.jpg
- frame padding: how many digits for eframe extention, e.g. 0001 use 4 digits
- Render Animation Frames:
- Start frame: which frame to start render
- End frame: which frame to end render
- By frame: skip frames between each render
- Choose Render Camera:
- Renderable camera : pick your render camera
- Alpha Channel: render image include a alpha channel (RGBA)
- Depth Channel: render image include a depth channel (RGBZ)
- Set Image Size:
- Presets : popular render sizes
- width and height: render image size
- pixel aspect ratio: usually 1, square pixel
- device aspect ratio: usually same as width/height, square device pixel
- Default Lighting:
- Inside “Render Option” section
- turn it off to use your own lighting
Rendering Methods
- Batch Render from Maya: (Still or Animation)
- Click Render > Batch Render to batch render.
- To cancel the render, click Render > Cancel Batch Render
- To show the image being rendered, click Render > Show Batch Render.
- IPR: After you start an IPR session, you can make changes to the scene, e.g. add lights, change shaders, etc., Maya recomputes the shading calculations and the selected region in Render View updates automatically.
- Render view rendering: Render a single frame:
- From the main Maya window, click the Render Current Frame button, or select Render > Render Current Frame. Maya renders the current scene and displays the image as it renders in Render View.
- Render the whole image or a sub-region.
- To save the image: File->Save Image.
- Commandline: Render -r <renderer name> <options> <filename>
- Example: Render -r mr -cam RenderCam -x 1920 -y 1080 -s 1 -e 100 -b 5 -pad 4 -rd ./images -im animrendertest -of jpeg -log log.txt myrendertest.ma
- Camera must be renderable
Render Layers and Passes
- Render layer : decompose complex scene into smaller groups of objects.
- Render pass : decompose complex rendering into attribute maps: color, shadow, specular, etc.